CUPCAKE TESTERS WANTED!!!

"I'm on a diet. I only eat cupcakes on days that ends in a Y."


Thursday, December 1, 2011

Chocolate Mint Cupcake Trees

Just in time for the holidays, I whipped up a delicious batch of Chocolate Mint Cupcakes.  I made these for a Recreation and Wellness event at BGSU.  They are full of gluten and dairy and a few other things my youngest cannot eat, so I am glad to not have them sitting around the house!

SPOILER ALERT:  GLUTEN/DAIRY FREE CUPCAKES COMING NEXT WEEK!!!

Chocolate Mint Cupcake 
 I used my go to chocolate cake recipe and added mint.  I think this would be equally good if you chopped Andes Mints in place of the mint extract. I would use about 2/3rds cup.  I think it might actually be a little bit better.  If somebody trys it this way, let me know how it turns out! 

Beatty's Chocolate Cake
  Ingredients
  • 1 3/4 cups all-purpose flour
  • 2 cups sugar
  • 3/4 cups good cocoa powder
  • 2 teaspoons baking soda
  • 1 teaspoon baking powder
  • 1 teaspoon kosher salt
  • 1 cup buttermilk, shaken
  • 1/2 cup vegetable oil (I used canola)
  • 2 extra-large eggs, at room temperature
  • 1 teaspoon pure vanilla extracts
  • 1/4 tsp mint extract
  • 1 cup freshly brewed hot coffee ( I used decaf) 
Sift the flour, sugar, cocoa, baking soda, baking powder, and salt into the bowl of an electric mixer fitted with a paddle attachment and mix on low speed until combined. In another bowl, combine the buttermilk, oil, eggs, vanilla and mint. With the mixer on low speed, slowly add the wet ingredients to the dry. With mixer still on low, add the coffee and stir just to combine, scraping the bottom of the bowl with a rubber spatula.  Fill lined cupcake pans 1/2 full.  Bake for approximately 18-22 minutes


The Frosting


1 scant cup shortening
2 sticks unsalted butter -at room temperature 
2 pounds powdered sugar (approximately)
1/4 c heavy whipping cream (more or less depending upon the texture you are looking for)
1/8 tsp-1/4 tsp mint extract


Cream shortening and butter.  Mix in powdered sugar.  Add milk until you reach the consistency you are looking for.  Mix in mint extract.

This made enough to generously frost 24 cupcakes with about 1 cup left over.

To Decorate


I generously piped on the frosting with a 1 M  Wilton tip.  I added white sugar beads and white fondant stars.  The kids and I had a GREAT time decorating these! They especially liked cutting out the fondant stars.


Tuesday, November 8, 2011

A pause in blogging....

Loyal Cupcake Blog Readers....

I'm going to  take a break from cupcake blogging for awhile.  Our youngest has just been identified with quite the list of food sensitivities/allergies and it means a complete shift in how we eat and cook.  My energies are going to have to be transferred to learning how to cook gluten/dairy free.   I'm hoping to be back to cupcake blogging by January....with a whole new style of cupcake.

Thanks!
Rachel


Sunday, November 6, 2011

SORRY....

Hello Cupcake Fans!!!!


I'm so sorry I did not get a cupcake up last week.  I had strep and was really under the weather.  My excellent husband convinced me I should be healthy  before whipping  up a batch of cupcakes. I am feeling much better and will certainly have a post headed your way this week.  Stay tuned!!!!

Spoiler Alert:  The cupcake this week will be topped with chocolate designs created in ice cold vodka!  So Fun!


Thursday, October 27, 2011

Win a $10.00 Gift Card to Tim Hortons or Starbucks

And the winner is.....Marcia!  Thanks to all who played along! 

This week A Cupcake Story hit 1000 page views!!!!  In celebration,  I'm doing a Starbucks or Tim Horton's gift card give away!!!!  Here are the details: 

1) Become a follower of my blog.
2) In the comments section of THIS BLOG POST- Leave a message as to your gift card preference and a way to contact you if you win (email or FB message)  
3)  Only individuals with a US mailing address will be eligible to win.
4)  My Five year old will randomly choose a winner from my blog followers on Tuesday November 1st.


Let your friends know!!!! Thanks and have fun!!!


Wednesday, October 26, 2011

Chocolate Chip Cookie Dough Cupcakes - Week 14

This delicious cupcake post dedicated to my dear friend Jamie!! Thanks so much for the idea.  My only regret about making this recipe is  not being able to deliver them to you!!!

If you are a cookie dough fan, then you don't want to skip this cupcake recipe!  If you are not a cookie dough fan, then shame on you!!!!  My only complaint  is  it might  be a little TOO much cookie dough.  (GASP!!! Until today I didn't think such a thing was possible!) Ladies, turn your brain on auto pilot when you see how much butter is in the recipe.  There's a lot of calories packed into a tiny wrapper, so plan on working in an additional jog the day you indulge.


Chocolate Chip Cookie Dough Cupcakes
Adapted From:  Annie's Eats


For the cupcakes:
3 sticks unsalted butter (1 1/2 cups), at room temperature
1½ cups light brown sugar
4 large eggs
2 2/3 cups all-purpose flour
1 teaspoon baking powder
1 teaspoon baking soda
¼ teaspoon salt
1 cup milk
2 teaspoons vanilla extract
1 cup semisweet chocolate chips

Directions:
Preheat the oven to 350° degrees. Line cupcake pan with 24 liners.

In the bowl of a stand mixer fitted with the paddle attachment, combine the butter and brown sugar. Beat together on medium-high speed until light and fluffy, about 3 minutes. Mix in the eggs one at a time, beating well after each addition and scraping down the sides of the bowl as needed.

Combine the flour, baking powder, baking soda, and salt in a medium bowl. Stir together to blend. Add the dry ingredients to the mixer bowl on low speed, alternating with the milk, beginning and ending with the dry ingredients, mixing each addition just until incorporated. Blend in the vanilla. Fold in the chocolate chips with a spatula.

Divide the batter evenly between the prepared cupcake liners. Bake for 18-20 minutes, until a toothpick inserted in the center comes out clean. Allow to cool in the pan 5-10 minutes, then transfer to a wire rack to cool completely.


I did not use the filling from the original recipe.  I filled the cupcakes with safe to eat cookie dough.

Filling: Raw Cookie Dough (SAFE TO EAT!!!)
Adapted From: Cupcake Project


2 c all-purpose flour
1/2 tsp salt
3/4 c unsalted butter, melted
1c packed brown sugar
1/2 c white sugar
1 T vanilla extract
4 T milk 
mini chocolate chips - use as many or as few as you would like

Mix all ingredients in a big bowl. That's it! To fill cupcakes, remove a small amount  of the cake from the top.  I prefer the cone method.  Then fill with the appropriate size ball of cookie dough.

Note:  This nearly double the amount of cookie dough that I needed.  I suggest cutting the recipe in half.  Another idea might be to make the whole recipe and save the left over in the fridge to shamelessly indulge in on a rough day.  


Cookie Dough Frosting
Source: Annie's Eats


3 sticks unsalted butter (1 1/2 cups), at room temperature
¾ cup light brown sugar, packed
3½ cups confectioners’ sugar (powdered sugar)
1 cup all-purpose flour
¾ teaspoon salt
3 Tablespoons milk
2½ teaspoons vanilla extract


To make the frosting, beat together the butter and brown sugar in the bowl of a stand mixer fitted with the paddle attachment until creamy.  Mix in the confectioners’ sugar until smooth.  Beat in the flour and salt.  Mix in the milk and vanilla extract until smooth and well blended.  This recipe make enough to generously frost 24 cupcakes.


Wednesday, October 19, 2011

Pumpkin Cupcakes with Dulce de Leche - Week 13

I have wanted to make dulce de leche for 12 weeks, and I finally decided I would pair it with pumpkin!!  The perfect fall combo.  These cupcakes scream fall flavor!  They seem as if they have a lot of steps, but if you make the dulce de leche ahead of time they come together quickly!   The end result it a rich treat! If you are looking for something a little less rich, do not fill the cupcake. 

Perhaps you are thinking to yourself, "What is dulce de leche?"  I am honored that my little blog gets to introduce it to you.   Dulce de leche is a thick milk based caramel spread. In Rachel terms, it's heaven on a spoon!!!  It's absolutely worth the wait time that it takes while you are making it!   I did cheat a little bit when I made it this time around.  I did not start it from scratch.  I made it using a can of sweetened condensed milk.  There are many different ways to prep it, but I choose to follow the seasoned advice from Steph at Cupcake Project.  I have not included how to make it in my recipe, but click on the link to see her extremely easy method.  It's extremely easy!  All you need is a crock pot, sweetened condensed milk, and 8-10 hours!

Dulce De Leche -Crock Pot Method 

Pumpkin Cupcakes- 
This cupcake is delicious and moist! 
Adapted from Martha Stewart
Makes 12 cupcakes Ingredients
1 cup pluse 2 tablespoons cake flour
1/2 teaspoon baking soda
1/2 teaspoon baking powder
1/2 teaspoon coarse salt
1/2 teaspoon ground cinnamon
1/2 teaspoon ground ginger
1/8 teaspoon ground nutmeg
1/8 teaspoon allspice
1/2 cup packed light brown sugar
1/2 cup granulated sugar
1/2 cup (1 stick) unsalted butter, melted and cooled
2 large eggs, lightly beaten
7.5 ounces pureed pumpkin

Divide batter evenly among liners, filling each about halfway. Bake until tops spring back when touched, and a cake tester inserted in the center comes out clean, 20 to 25 minutes, rotating pans once if needed. Transfer to a wire rack; let cool completely.

When I was trying to decide how to decorate this cupcake, I came across the exact cupcake I was attempting to make at The Sweetest Kitchen.  She even used the same Martha recipe I did.  I thought my cupcake idea was brilliant, but apparently it's not my cupcake idea at all!!!  I'm posting the frosting recipe from her page, because it's approximately what I did, but I didn't measure!


Dulce De Leche Buttercream
From The Sweetest Kitchen
Makes enough to generously frost 12 cupcakes

Ingredients
3/4 cup (1 1/2 sticks) unsalted butter, softened
1 1/2 tablespoons heavy cream
1/2 teaspoon vanilla
2 cups powdered sugar
pinch of salt
1/4 cup + 2 tablespoons prepared dulce de leche

Cream together softened butter and powdered sugar on low using an electric mixer. Add cream and vanilla and beat on medium speed until smooth and no lumps appear. Scrape down the sides of the bowl. Add the prepared dulce de leche and beat to incorporate.


I filled the cupcake with Dulce De Leche and made the spider web by piping on melted chocolate chips!

Enjoy!!!! Let me know what you think in the comment section!!!  


Friday, October 14, 2011

Apple Pie - Week 12

 A few weeks ago we took our boys to a local apple orchard and it inspired me to start looking for apple cupcake recipes.   Delicious yet slightly messy to eat.  Enjoy!!! 
 
Apple Pie Cupcakes

Adapted from Annie's Eat
Yield: 24 cupcakes
 Ingredients:
For the cupcakes:
3 cups sifted cake flour
1 tbsp. baking powder
1/2 tsp. salt
1/2  tsp cinnamon 
1 cup unsalted butter, at room temperature
2 cups sugar
4 eggs
1 ½ tsp. vanilla extract
1 cup milk
For the apple filling: (I doubled the filling recipe to fill 24 cupcakes)
2 tbsp. butter
2 tsp. cinnamon
2-4 tbsp. sugar
3 large apples, peeled, cored and diced  (I used Yellow Delicious)  

To make the cupcakes, preheat the oven to 350°.  Line two cupcake pans with paper liners.
In a medium bowl, sift together the cake flour, baking powder, salt, cinnamon.  In the bowl of an electric mixer, cream the butter and sugar together on medium-high speed until light and fluffy, about 2 minutes.  Beat in the eggs one at a time, mixing well and scraping down the sides of the bowl after each addition.  Add the vanilla extract and mix well to combine.  Add in the dry ingredients alternately with the milk, beginning and ending with the dry ingredients.  Stir until just combined.
Divide the batter evenly among the cupcake liners, filling them about 2/3-3/4 full.  Bake until golden and a toothpick inserted in the center comes out clean, about 18 to 22 minutes.  Remove from the oven and allow to cool for 5 minutes in the pans.  Transfer to wire racks to cool completely.

To make the apple filling, heat the butter a medium skillet over medium-high heat.  Add the cinnamon and sugar and cook for a minute, until the mixture begins to bubble.  Lower the heat to medium and stir in the apples.  Mix well.  Cook until the apples are somewhat tender, about 10 minutes.  Remove from heat and let cool.

While the apple mixture is cooling,  use the cone method to remove a chunk from the center of each cupcake, making sure to leave a rim around the top of the cupcake.  Fill the holes with the cooled apple mixture.  What's the cone method?  It's pretty simple.  Use a knife to cut out a cone shape out of the center of your cupcake. 

 I drizzled a caramel syrup over the tops and then topped them off with a swirl of vanilla buttercream. 

Caramel Syrup
15 caramels
2-4 T half in half
Place unwrapped caramels and half in half in a microwave bowl.  Heat for 1min 30seconds, stir well.  Continue to heat in 30 sec increments until mixture is smooth.  

Vanilla Buttercream
1/2 c unsalted butter
1/2 c Crisco
4 cups confectioners sugar
1 1/2 tsp Vanilla
2-4 T half in half
Cream butter and Crisco.  Beat in sugar until fluffy, approximately 2 minutes.  Mix in sugar and Vanilla.  Add half in half one tablespoon at a time until frosting is the desired consistency. 

Wednesday, October 5, 2011

Mocha Cupcakes - Week 11

“Coffee makes it possible to get out of bed, but cupcakes makes it worthwhile."   Combine cupcakes and coffee and you have pure delight! 

If you know me, then you know I am a coffee addict.  I LOVE LOVE LOVE coffee, and I am fairly certain I need it almost like I need air.  (I can see my husband shudder as he reads the previous statement.  Insert his rant on my caffeine addiction here.)  This week's cupcake is a salute to my addiction.  This recipe is from the blog Life in a Peanut Shell.  

This cupcake creation is NOT overly sweet, but it is big on coffee taste.  If you are not much for coffee, this week will not be your favorite cupcake.  I think these are DELICOUS!!  I particularly enjoy  the light and fluffy whipped topping.  The whipped cream certainly makes the mocha!!!   If you'd prefer frosting on the sweeter side I suggest adding confectioners sugar to the whipped mocha ganache.


FRIENDLY WARNING - If you are like me and you taste as you go, caffiene/sugar buzz may directly co-inside with the making of these cupcakes.  Maybe my caffeine frenzy could be directly related to the fact that I had three cups of coffee prior to making these.

Chocolate Coffee Cupcake
(Recipe Adapted From Daniel Boulud)

1/2 cup plus 2 tablespoons milk
6 tablespoons unsweetened cocoa powder
1/4 cup instant coffee powder (I used nearly double this amount)
1 1/2 cups cake flour
1/2 teaspoon baking soda
1/4 teaspoon salt
12 tablespoons unsalted butter -- at room temperature
1 cup plus 2 tablespoons granulated sugar
1/2 teaspoon vanilla extract
3 large eggs

To make the chocolate-coffee cupcakes:
Preheat the oven to 350 degrees F. Line standard muffin cups with paper liners.

Combine the milk, cocoa, coffee and 1/4 cup water in a small saucepan and bring to a boil, constantly whisking, until the cocoa and coffee have dissolved. Let cool and pour into a liquid measure.

Sift together the flour, baking soda, and salt. In the bowl of a mixer, cream the butter, sugar, and vanilla on medium speed until light and fluffy. Add the eggs, one at a time, mixing well after each addition. With the mixer on low speed, add the dry ingredients alternately with the milk mixture in three batches, ending with the liquid. Fill each muffin cup halfway with the batter. Bake 18 to 20 minutes until a toothpick inserted into the center comes out clean. Remove the cupcakes from the pan and let cool completely on a wire rack. My cupcakes only baked for approx 16 minutes.  Watch these very closely because they go from being perfect to dry very quickly.  I got 20 cupcakes from the recipe.  


Espresso Buttercream  adapted from Life in a Peanut Shell
 

This is the frosting recipe I used to fill these cupcakes.  It is YUMMY!!!

1 cup butter, softened or at room temperature
3 cups confectioner's sugar
1 teaspoon vanilla extract
pinch of salt
3-4 Tablespoons Starbucks Doubleshot Espresso & Cream, or until desired consistency

Cream butter, sugar, vanilla and salt until fluffy (Approimately three minutes.) Add Espresso until frosting reaches desired consistency.  This made more than enough frosting to fill the cupcakes.  You can probably half this recipe and still have extra frosting.  I choose to make the entire recipe and then enjoyed a spoonful or two.  :)  


 I topped the cupcakes with the suggested ganache and whip cream.  My adaptations of the recipes follow.  


Whipped Mocha Ganache adapted from Life in a Peanut Shell

1 cup heavy cream
1/3 cup coffee beans -- crushed
8 ounces milk chocolate -- finely chopped 

Combine 1 cup of the heavy cream and coffee beans in a small saucepan and bring to a boil over high heat. Remove from the heat, cover, and let infuse for 10 minutes. Strain through a fine-mesh sieve into a clean sauce-pan and bring back to a boil. Put the chocolate in a medium bowl and pour the hot cream over it, stirring slowly, until the ganache is smooth.  Let ganache cool to room temperature and then whip in a mixer until fluffy.  Spoon enough ganache over cupcakes.  

White Chocolate Whipped Cream adapted from Life in a Peanut Shell


8 ounces of white chocolate chopped
2 and 1/2 cups of heavy cream
1 and 1/2 teaspoons vanilla extract

Put the white chocolate in a medium heat proof bowl. In a small sauce bring 1/2 cup of the cream to a boil. Pour the hot cream over the chocolate. Let stand for 1-minute, then whisk until smooth. Let the white chocolate cream stand until cooled to room temperature.
In a chilled bowl with chilled beaters beat the remaining 2 cups of heavy cream and vanilla until softly whipped. Stir in the white chocolate cream and beat until fairly stiff. taking care not over beat, which would cause the ganache to separate.

This makes almost double the amount needed to frost 20 cupcakes, however it is also really good with strawberries.  Save the extra whip cream in the refrigerator and use it with strawberries a few days later.  If you choose to save this make sure to re-whip before serving!   


Tuesday, September 27, 2011

The Ultimate Vanilla Cupcake? - Week 10


I am a follower of the blog,  Cupcake Project.  Steph, the author, has been working diligently to find the "Ultimate Vanilla Cupcake."  This week she crowned the winner, and it is the cupcake I chose to make for week 10. 

I was really excited to try this recipe. I was slightly intimidated that it called for whole vanilla beans, something I have never worked with. When I went grocery shopping for the needed supplies I nearly abandoned my quest to try this cupcake.  Whole vanilla beans are EXPENSIVE.  I paid seven dollars for two beans.  In retrospect, that is not a horrible grocery store price.  I'm glad I didn't change recipes, I really liked working with the vanilla beans.  In the future I will probably purchase them online in bulk.  The  flavor is EXCELLENT!!!

I'm looking forward to hearing back from my faithful cupcake testers about what they liked or didn't like about this cupcake.  I'm still deciding if it's my favorite vanilla recipe, but it is certainly a make again!  If you give it a try, let me know what you think!!!

Ultimate Vanilla Cupcake - From Cupcake Project
I made no changes to her recipe because I wanted to see if  it lived up to the hype.  Take some time and click on the link to read about how Steph determined to crown this particular recipe the Ultimate Vanilla Cupcake.

Yield: 16 cupcakes

  • 1 cup (225 grams) granulated sugar
  • 1 vanilla bean
  • 1 3/4 cups (175 grams) cake flour, not self-rising
  • 1 1/2 teaspoons baking powder
  • 1/2 teaspoon baking soda
  • 1/2 teaspoon salt
  • 1/4 cup (57 grams) unsalted butter, room temperature
  • 2 large eggs, room temperature
  • 1/3 cup (75 grams) full-fat sour cream
  • 1/4 cup canola oil or vegetable oil (60 ml)
  • 1 tablespoon pure (not imitation) vanilla extract
  • 2/3 cup (160 ml) whole milk
  1. Preheat oven to 350 F (175 C).
  2. In a small bowl, combine sugar and seeds from the vanilla bean. (For those of you who are new to using vanilla beans, check out this video to learn how to get the seeds out of the bean.)
  3. Using the back of a spoon, move around the bowl and apply pressure to break up any clumps of seeds and to better infuse the vanilla flavor into the sugar. Set aside.
  4. In a medium-sized mixing bowl or bowl of a stand mixer, mix together cake flour, baking powder, baking soda, and salt.
  5. Add the vanilla bean sugar and mix until well combined.
  6. Add butter and mix on medium-low speed for three minutes.  Because there is so little butter, you'll end up with a very fine crumb texture.
  7. In a small mixing bowl, whisk together eggs, sour cream, oil, and vanilla extract until smooth.
  8. Add the egg mixture to the flour mixture and beat on medium speed until just combined.
  9. Slowly add milk and mix on low speed until just combined.  The batter will be liquid.  (Don't worry, you didn't do anything wrong.  It's supposed to be that way.)
  10. Fill cupcake liners just over 1/2 full.
  11. Bake for 14 minutes and then test to see if they are done. They are done when a toothpick comes out without wet batter stuck to it.  The cupcakes should appear white with specks of vanilla bean. They should not turn a golden brown.  If they are not done, test again in two minutes.  If they are still not done, test again in another two minutes.
  12. When the cupcakes are done, remove them immediately from the tins and leave them on a cooling rack (or just on your counter if you don't own a cooling rack) to cool.


I topped this delightful little cupcake with Nutella buttercream and chocolate sprinkles.  If you are a Nutella fan you will LOVE this frosting.  I am quite happy with how it turned out. 

Nutella Frosting
12 tablespoons unsalted butter (room temperature)
1 jar Nutella
4 cups powdered sugar
1tsp vanilla
1/3 cup whole milk

Using paddle attachment, cream butter, Nutella, powdered sugar, and vanilla until smooth. (Approx 3 minutes.) Add milk 1 tablespoon at a time until it reaches desired consistency. 


Wednesday, September 21, 2011

Snickerdoodle - Week 9

The flavor of the week is....
SNICKERDOODLE!!! I love all things snickerdoodle.  What I like the most about this cookie is the texture, but I am unsure how to translate that into a cupcake.  My sister-in-law, Paula, introduced me to The Farm Girl, and her recipe inspired me to give these a try.  On her blog I discovered chocolate snickerdoodle cookies.  It seems perfect. The following is my copy-cat version of  The Farm Girl's cupcakes/cookies.  I'm still drooling thinking about chocolate in my snickerdoodle.  The cupcake itself does not reflect the texture of a snickerdoodle, but that's why there is the cookie on top!!!

 Snickerdoodle Cake- adapted from The Farm Girl


3 1/3 c. all-purpose flour
1 1/4 tsp. ground cinnamon
1 tsp. baking powder
3/4 tsp. baking soda
1/2 tsp. salt
3 sticks butter, softened
2 c. sugar
4 large eggs
1 tsp. vanilla extract
1 1/4 c. buttermilk
Cinnamon sugar: 
1 Tbsp sugar and 1 tsp cinnamon

1.  Preheat oven to 350 degrees.  Sift together dry ingredients (except for cinnamon sugar).  In the bowl of a stand mixer with a paddle attachment cream butter and sugar until fluffy, about 2 -3 minutes.  Add eggs one at a time beating well after each addition.  Add vanilla.  Alternately add flour mixture and buttermilk beginning and ending with flour.  Fill cupcake pans 2/3 full.  Sprinkle with cinnamon sugar mixture.  Bake for 20-25 minutes.  Cool in pan for 5 minutes and remove. Let cool completely before frosting.

Cinnamon Frosting - adapted from The Farm Girl
(I could get used to cinnamon in my frosting!)

1/2c butter, softened
1/2c shortening
1 tsp vanilla
4 c powdered sugar
2-4 tablespoons half-n-half
1 tsp cinnamon

Cream butter and shortening in mixer until smooth. Mix in vanilla and powdered sugar  Add half-n-half until the frosting is the consistency you would like for decorating. Add cinnamon and mix until combined. 

Frost cupcakes and top with 1/2 of a chocolate snickerdoodle.


Chocolate Snickerdoodle Cookies - The Farm Girl
1/2 c. butter flavored shortening (it's totally worth it)
1/2 c. butter, softened
1 1/2 c. sugar
2 eggs
1 tsp. vanilla
1/3 c. cocoa
2 2/3 c. all-purpose flour
2 tsp. cream of tartar
1 tsp. baking soda
1/2 tsp. salt
sugar, for rolling

1.  Preheat oven to 400 degrees.  Cream shortening, butter, and sugar until light and fluffy.  Add eggs, one at a time, beating well after each one.  Add vanilla and beat again.  

2.  In a medium bowl combine cocoa, flour, cream of tartar, baking soda, and salt together.  Add flour mixture to creamed mixture and stir until completely incorporated.  Place extra sugar in a small bowl.  Roll mixture into small balls and roll in sugar.  Place about 2" apart on greased cookie sheets.  Bake for 8 minutes.  Remove, let sit for 5 minutes before removing to cooling rack.

Wednesday, September 14, 2011

Margarita Cupcakes - Week 8

When  margarita cupcakes were suggested to me I was rather skeptical, but I think they are Yum-o! I searched high and low for a recipe for margarita cupcakes I found nearly 90% of the recipes used a box cake mix.  I am pretty anti-boxed mixes, for the purpose of this blog.  I thought about creating my own version using a favorite white cake recipe, but I did want to have to play trial and error this week.  I finally decided on a recipe from The Brown Eyed Baker.  Thanks to Kristen Lichtle for introducing me this blog.  I LOVE it!!

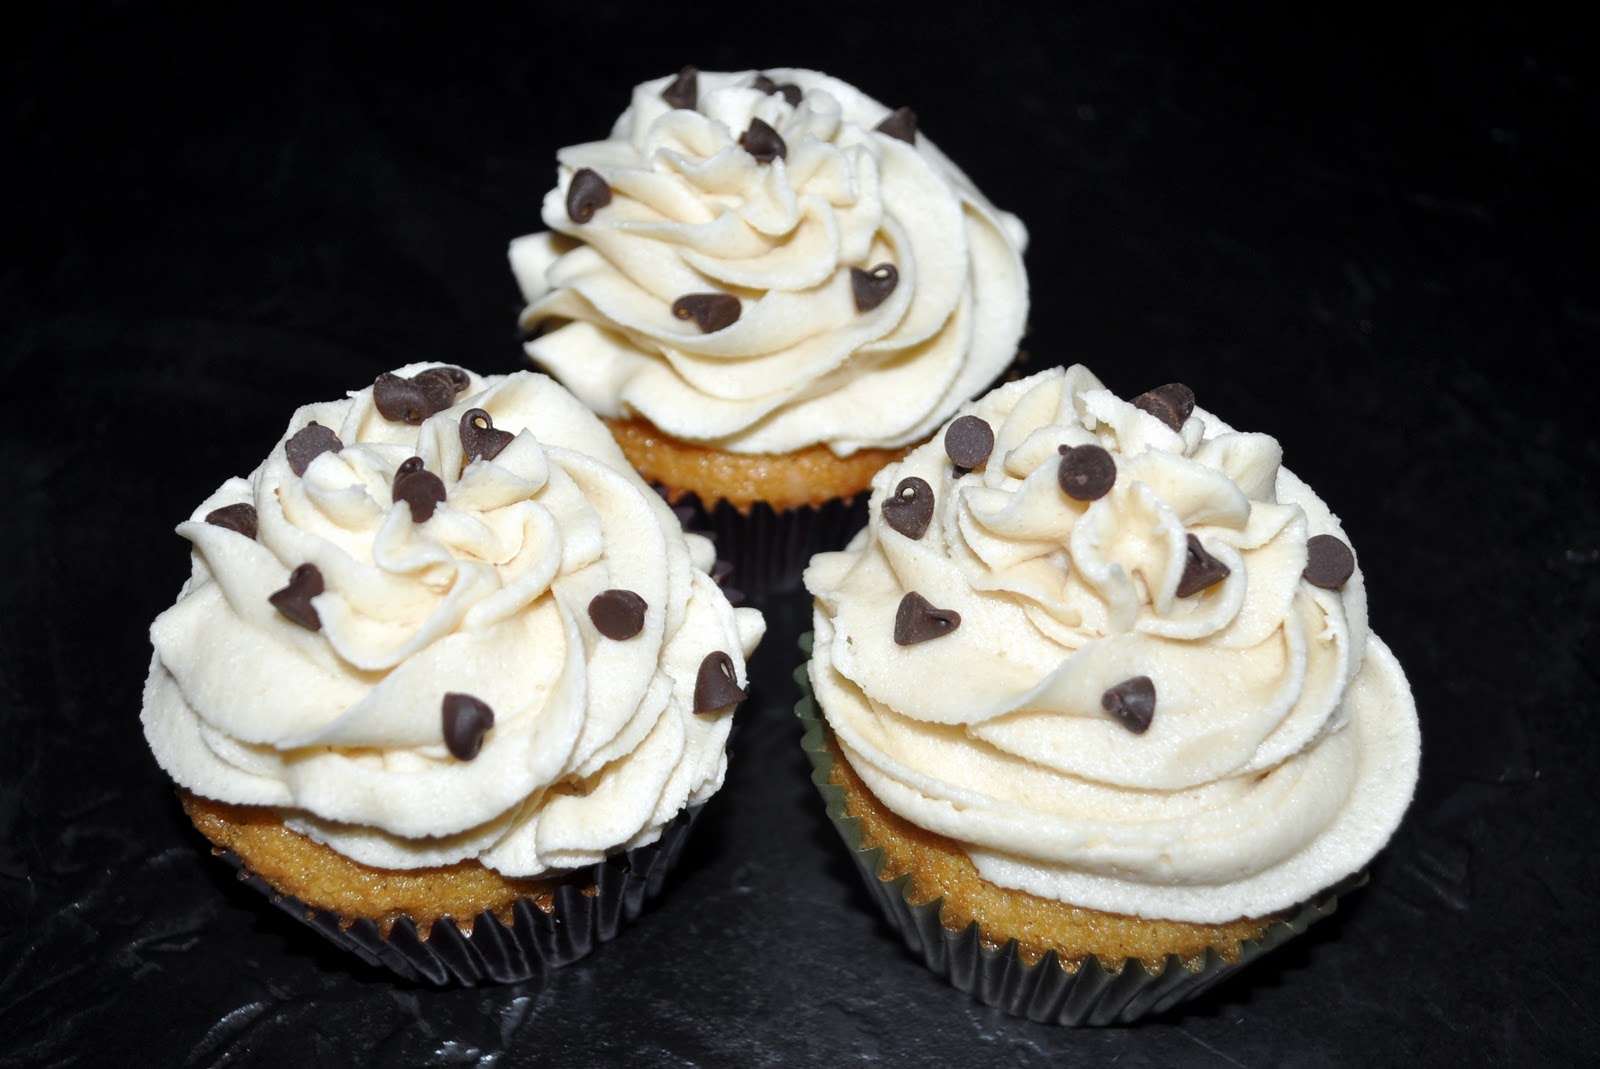
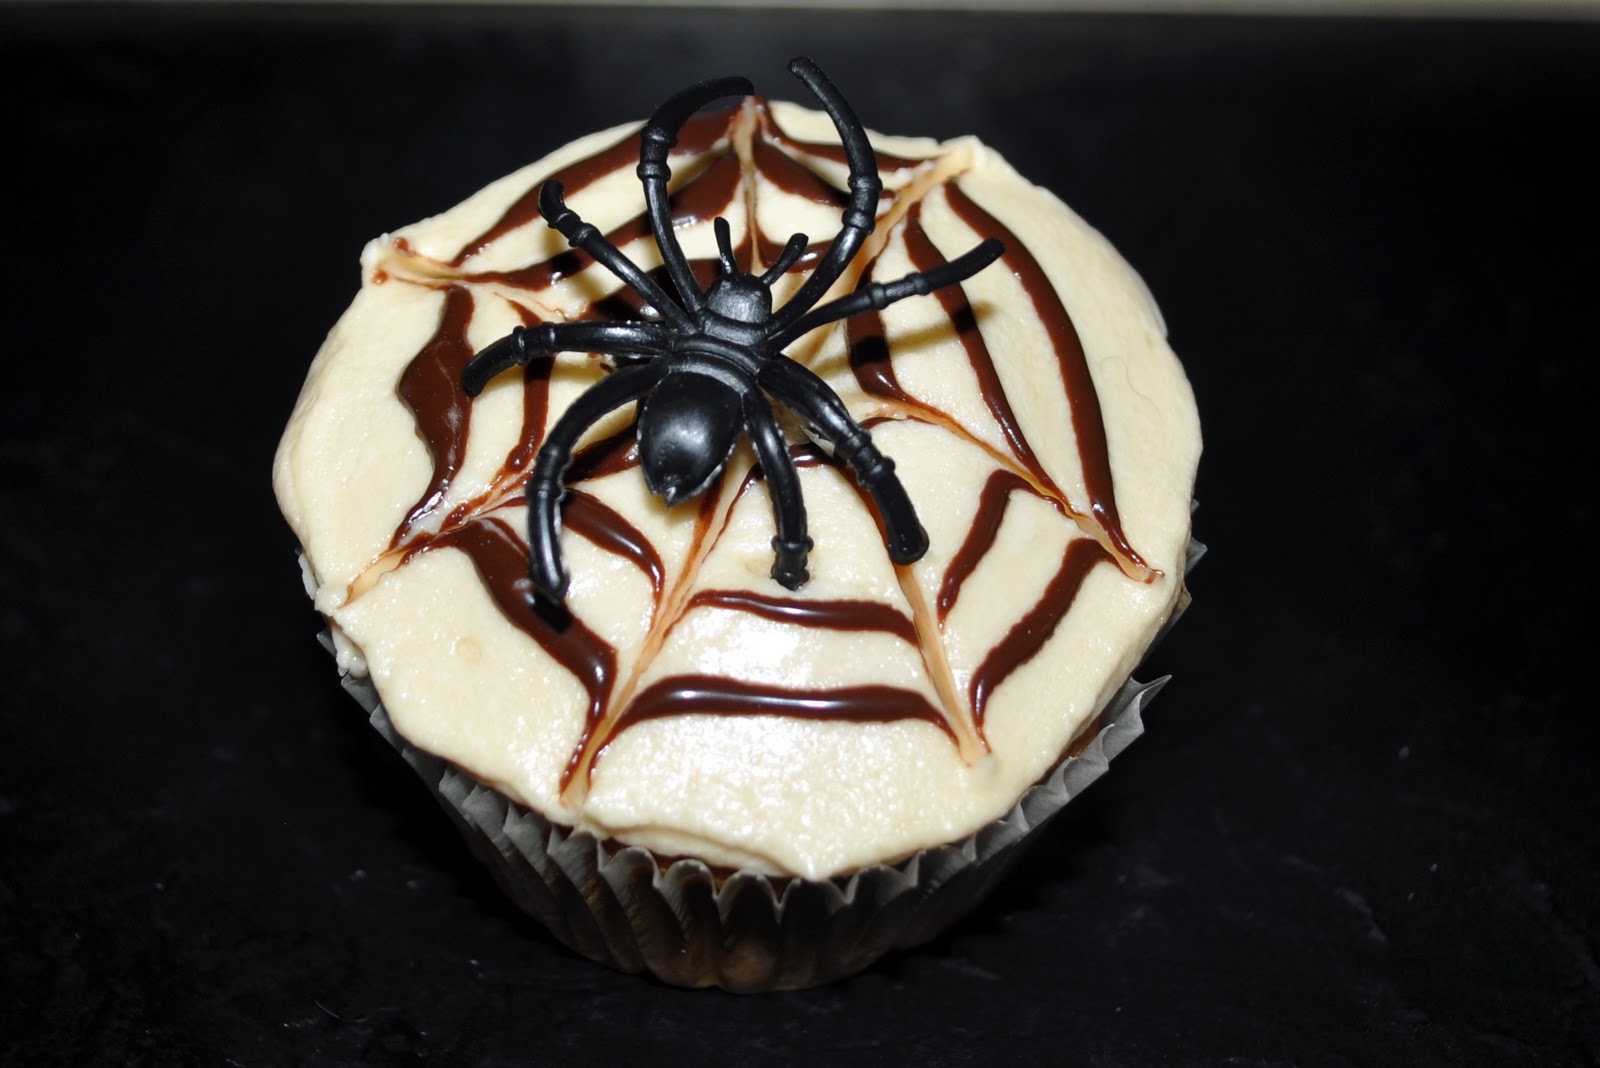
I made a few cupcake holders for these and I think they'd be really cute with either an umbrella or a straw placed off to the side.  Overall I think these turned out well. It's been a really long time since I've had a margarita, so I'm not sure they really taste like one.  The tequila flavor is mild, and I think it compliments the lime nicely. 


Margarita Cupcakes - from Brown Eyed Baker


Yield: 12 cupcakes
Prep Time: 25 minutes | Bake Time: 25 minutes
For the Cupcakes:
1½ cups all-purpose flour
1½ teaspoons baking powder
¼ teaspoon salt
½ cup unsalted butter, at room temperature
1 cup granulated sugar
2 eggs, at room temperature
Zest and juice of 1½ limes
2 tablespoons tequila
¼ teaspoon vanilla extract
½ cup buttermilk


To Brush the Cupcakes:
1 to 2 tablespoons tequila

For the Tequila-Lime Frosting:
1 cup unsalted butter, at room temperature
2¾ cups powdered sugar
1 tablespoon lime juice
2 tablespoons tequila
Pinch of coarse salt

1. Preheat the oven to 325 degrees F. Line a standard muffin tin with paper liners; set aside.
2. In a medium bowl, whisk together the flour, baking powder and salt; set aside.
3. In an electric mixer on medium-high speed, beat the butter and sugar together until pale, light, and fluffy (about 5 minutes).
4. Reduce the mixer speed to medium and add the eggs one at at time, mixing thoroughly after each addition.
5. Scrape the sides of the bowl and add the lime zest, lime juice, vanilla extract and tequila. Mix until combined. (The mixture may start to look curdled at this point, but don’t worry, it will all come back together, power on!)
6. Reduce the mixer speed low. Add the dry ingredients in three batches, alternating with the buttermilk in two batches. Mix only until just incorporated, using a rubber spatula to give it one last mix by hand.
7. Divide the batter between the muffin cups. Bake for approximately 25 minutes or until just slightly golden and a skewer shows only moist crumbs attached, rotating the pan at the halfway point.
8. Allow cupcakes to cool for 5 to 10 minutes, and then remove to a cooling rack. Brush the tops of the cupcakes with the 1 to 2 tablespoons of tequila. Set the cupcakes aside to cool completely before frosting them.
9. To make the frosting, whip the butter on medium-high speed of an electric mixer using the whisk attachment for 5 minutes. Reduce the speed to medium-low, and gradually add the powdered sugar, mixing and scraping the sides of the bowl until all is incorporated. Give it a mix on medium speed for about 30 seconds. Add the lime juice, tequila and salt mix on medium-high speed until incorporated and fluffy. If the frosting appears a bit too soft, add some additional sugar, one spoonful at a time until desired consistency is reached. Frost cupcakes and garnish, if desired, with lime zest, an additional sprinkling of salt and a lime wedge.

*Note #1: If you would prefer to not use liquor in these cupcakes, you can absolutely omit it from both the cupcakes and the frosting with no problem. If you do omit it, I would add 1 tablespoon of vanilla extract to the frosting.

Thursday, September 8, 2011

Got Recipes?

I have received several recipe ideas from other people as a result of blogging about my adventures in cupcakes.  Although completely unexpected, I really  appreciate this!!!  If you find something you think I should give a try, send it my way!  No promises I'll get to it right away, but I will add it to the cupcake list! 

Homemade Hostess Cupcakes - Week 7

This week I decided to create my own version of a homemade hostess cupcake. They turned out pretty well, but be warned they are a bit addictive.   My family loves dark chocolate, so these have a dark chocolate spin compared to a traditional hostess cupcake. Give them a try and tell me what you think!!!!


The Cake
The credit for the find of this cake recipe goes to my father-in-law, Jim. Thanks Dad!! Sadly he did not get to indulge in the temptation of tasting this delicious recipe. 


The Ultimate Chocolate Cupcakes -adapted from a Cooks Country Episode, Season 11
Ingredients:
3 ounces bittersweet chocolate, chopped fine
1/3 cup cocoa
3/4 hot coffee (I made the coffee strong)
3/4 c bread flour
3/4 c granulated sugar
1/2 tsp salt
1/2 tsp baking soda
6 T vegetable oil (I used canola)
2 large eggs
1 tsp vanilla extract

Preheat oven to 350. Place chocolate and cocoa in medium bowl. Pour hot coffee over mixture and whisk until smooth. Set in refridgerator to cool completely.  Whisk flour, sugar, salt and baking soda together in a medium bolw;set aside. Whisk oil eggs vinegar and vanilla into cool chocolate-cocoa mixture until smooth.  Add flour mixture and whisk until smooth.  Fill muffin pans 2/3 full.  Bake until set an just firm to touch, 17-19 minutes.  Cool completely.  Makes 12-14 cupcakes

The Filling
I made the filling of a combination of a marshmallow cream recipe and a buttercream recipe.  I whipped 1/2 cup of the butter cream into the marshmallow cream. 

Marshmallow Cream: adapted from Annie's Eats

4 egg whites
 1/4 tsp cream of tarter
1 cup sugar
1 tsp vanilla

Mix egg white, cream of tarter, and sugar together.  Heat in a double boiler over medium high heat.  Whisk constantly until mixture reaches 160 degrees. Transfer liquid into a mixing bowl and beat using a whisk attachment until fluffy and peaks form. Let cool.

Buttercream -   I usually do not use a specific recipe for buttercream, so this is what I threw in the mixing bowl this time around. 

 8T butter
2 cups powdered sugar
1/4 tsp vanilla
1-2 T heavy cream

Mix butter and powdered sugar together in a mixing bowl.  Beat in vanilla and cream. 
 
Filling a cupcake.
 I did not take pictures of how I did this, but it's not difficult.  Remove a small portion of the cake from the center of the cupcake.  I use a knife, or if I have been doing a lot of baking and have no clean knives I use a baby spoon.  (If you like a little more filling, remove a little more cake.  If you like a little less, remove a little less.  My tastes fall on the little more side of the spectrum.)   Pipe or spoon in filling.  I prefer piping filling. 

The Ganache

6 oz semi-sweet chocolate chips ( If you are a huge dark chocolate fan I suggest using bittersweet 
   chocolate)
3/4 cup heavy cream

Mix chocolate and cream in a double boiler.  Stir regularly until smooth. Frost cupcakes. 

The Buttercream Curly Cues
To create the curly cues on top of the ganache, first let the ganache frosted cupcakes cool completely. Add a little more cream to the left over buttercream to make it a little less stiff.  Pipe curls onto cupcakes


Wednesday, August 31, 2011

Buckeye Cupcakes - Week 6

This week's cupcakes were inspired by the delicious buckeye candies.  I'm really please with these cupcakes, even if it took me two attempts to successfully make the delicious peanut butter frosting. The first time around i used all natural peanut butter to make the frosting. The frosting was extremely oily in texture.  I threw it in the trash and made it with Jiff.  DELICIOUS!!!I used my favorite chocolate cake recipe, followed by my favorite peanut butter frosting recipe and then decided to dip the cupcakes in a traditional chocolate coating used for making candy buckeyes! Make sure to put the peanut butter frosted cupcakes in the freezer for at least 30 minutes and then dip.
Three Excellent Helpers!!!
Beatty's Chocolate Cake
Adapted from: The Barefoot Contessa at Home Ingredients
  • 1 3/4 cups all-purpose flour
  • 2 cups sugar
  • 3/4 cups good cocoa powder
  • 2 teaspoons baking soda
  • 1 teaspoon baking powder
  • 1 teaspoon kosher salt
  • 1 cup buttermilk, shaken
  • 1/2 cup vegetable oil (I used canola)
  • 2 extra-large eggs, at room temperature
  • 1 teaspoon pure vanilla extract
  • 1 cup freshly brewed hot coffee ( I used decaf)
Sift the flour, sugar, cocoa, baking soda, baking powder, and salt into the bowl of an electric mixer fitted with a paddle attachment and mix on low speed until combined. In another bowl, combine the buttermilk, oil, eggs, and vanilla. With the mixer on low speed, slowly add the wet ingredients to the dry. With mixer still on low, add the coffee and stir just to combine, scraping the bottom of the bowl with a rubber spatula.  Fill lined cupcake pans 1/2 full.  Bake for approximately 17 minutes

 
Peanut Butter Frosting
Yield: Enough to frost 12 cupcakes ( I tripled the recipe to generously frost 28 cupcakes.)
Prep Time: 10 minutes
1 cup confectioners’ sugar
1 cup creamy peanut butter
5 tablespoons unsalted butter, at room temperature
¾ teaspoon vanilla extract
¼ teaspoon kosher salt
1/3 cup heavy cream
Place the confectioners’ sugar, peanut butter, butter, vanilla and salt in the bowl of an electric mixer fitted with a paddle attachment. Mix on medium-low speed until creamy, scraping down the bowl with a rubber spatula as you work. Add the cream and beat on high speed until the mixture is light and smooth.
(Recipe from Barefoot Contessa at Home by Ina Garten)
The Chocolate Dip
2 cup semi-sweet chocolate chips
2 T canola oil

Combine in a double boiler.  Watch closely and stir until melted. 


Wednesday, August 24, 2011

Orange Creamsicle Cupcakes - Week 5

When I decided to make these I thought, "My goodness this might be perfection in a cupcake!"  Then I actually started making them.....The final product is acceptable, but I do not think I will look back on week five with bright and shiny memories. 


I did not love the batter for this cake.  It was  unpredictable.  If I baked the cupcakes for 20 minutes exactly, the tooth pick came out clean, and they looked beautiful.  After I took them out of the oven, the center of the cake fell.  The middle falling only slightly bothered me, because a sunken middle means more room for frosting!  When I put the second round of cupcakes in I left them in for two extra minutes in hopes that the center would not fall.  Success!  They did not fall.  Fail! They were much to dry.   This recipe seems to be extremely sensitive.  Jerome (my hubby and resident cupcake taster)  believes the sunken middle cupcakes were much much better.  I tend to agree.  So if you bake these, watch them closely and take the cupcakes out as soon as they are done.  In my oven that means 20 min bake time.  No more, no less. 

The Cake

This recipe was adapted from Dulcedo
Makes a little over 24 cupcakes
1/2 cup pureed oranges ( I used 3 oranges)
1/2 cup buttermilk
1 teaspoon vanilla
2 teaspoon orange extract
2 cups sugar
1 cup vegetable oil
3 cups all-purpose flour
2 teaspoons baking powder
1 teaspoon baking soda
3/4 teaspoon salt


To make the cupcakes:
Preheat the oven to 350 degrees F. In a small bowl, whisk together the flour, baking powder, baking soda, and salt. Set aside.

Peel oranges (removing any seeds and as much of the white pith as possible) and puree in a blender or food processor. Measure out 1/2 cup of the liquidy pulp. In the bowl of an electric mixer, combine orange pulp, eggs, buttermilk, vanilla, orange extract, sugar, and vegetable oil.

With the mixer on low, gradually add in the flour mixture, beating until just incorporated.

Fill your cupcake containers  a scant 2/3 full and bake 20-25 minutes, or until a toothpick inserted into the center comes out clean.(These cupcakes rise, rise rise, so make sure to pay attention to the scant 2/3rd filling)


The Frostings/Fillings


Orange Frosting
A Dulcedo original
1 cup butter, room temperature
6-8 cups sifted powdered sugar
1/2 teaspoon vanilla extract
1/2 teaspoon orange extract
1/4 cup orange juice (preferably fresh)


To make the orange frosting:
In the bowl of an electric mixer, beat the butter at medium-high speed until creamy. Add half of the sifted sugar, the vanilla, the orange extract, and the orange juice. Beat until combined. Gradually add the remaining sugar until the frosting reaches your desired consistency.


When I made this I followed the directions, until the first half of the sugar was added. Then I added more oj, orange extract and powdered  sugar until it tasted like a dreamsicle.   I did not however pay attention to how much I added.  :(  Sorry.  


Marshmallow Fluff
Adapted from a Martha Stewart recipe
1 1/2 cups plus 2 tablespoons sugar
2 tablespoons light corn syrup
2/3 cup water
5 egg whites
1 teaspoon vanilla

To make the marshmallow fluff:
Heat 1 1/2 cups sugar, the corn syrup, and 2/3 cup water in a small saucepan over medium heat, stirring, until sugar has dissolved. Bring to a boil over medium-high heat. Wash down sides of pan with a wet pastry brush to prevent crystals from forming. Cook, without stirring, until a candy thermometer reaches 235 degrees.

Meanwhile, put egg whites into the bowl of an electric mixer fitted with the whisk attachment. Beat on medium speed until soft peaks form. Gradually add remaining 2 tablespoons sugar. Reduce speed to medium-low. Add the hot syrup in a slow, steady stream down sides of bowl. Raise speed to medium-high; beat until stiff peaks begin to form. With the mixer still running, gradually add the vanilla and continue beating until the fluff is smooth and cool, about 7 minutes.


A Rachel Side Note:  I did not originally plan on using the Martha Stewart Fluff recipe.  It gets rave reviews, but it has corn syrup in it, a n ingredient I usually run away from.  Then I started to wonder, "How much better can it really be?"  So I made it.  Personally I will not make it again.   Martha, I love you, but not so much your fluff.  It is good, but not good enough to entice me to replace it with my slightly "healthier" version. 


Decorating the Cupcakes 


In attempt to make use of the cupcakes that were a little dry and the ones that were really moist I decided to decorate them differently.  
The moist cupcakes with sunken tops, were piped with the marshmallow fluff and the orange frosting at the same time?  How does one achieve such a look?  Simple!  Fill one side of your piping bag with type A frosting and then fill the other half with type B.  I piped it on generously.  


The cupcakes that were a little dry, I filled with the marshmallow fluff.  Then I piped the orange frosting on top.  I was tired of piping the usual cupcake swoosh on top, so I piped the orange frosting to look like a rose.    


For this particular cupcake I prefer the double frosting "swoosh".  It looks a little more whimsical  and resembles the top of and ice cream cone.  When presented with both options, the kid inside me will almost always choose the "swoosh."    Which do you like the look of? 

Tuesday, August 16, 2011

Zucchini Cupcakes - Week 4

In honor of the abundant zucchini that is being harvested from my garden, I decided to use it in cupcakes. I think these qualify more as a muffin than a cupcake.  I'm  going to count them as my cupcake of the week, because my intention was to make cupcakes! I think this recipe is good, but it almost seems to be missing something.  I might add a touch of crystallized ginger to the batter next time. The frosting makes this treat much sweeter than I initially anticipated.  I think this cupcake would be nicely complimented by a good cup of coffee.   If you take some time to make this recipe let me know what you think in the comment section!

I used a recipe from the Taste of Home webpage, but I made several changes to it.  I have noted my changes with the recipe.

Ingredients


  • 3 eggs

  • 1-1/3 cups sugar (I used just under 1cup)

  • 1/2 cup canola oil (I used 1/2 cup applesauce)


  • 1/2 cup orange juice (I squeezed my own)

  • 1 teaspoon almond extract (I used 1/2tsp almond and 1/2 tsp vanilla)

  • 2-1/2 cups all-purpose flour ( I used 1 cup whole wheat and 1 1/2 c white flour)

  • 2 teaspoons ground cinnamon

  • 2 teaspoons baking powder

  • 1 teaspoon baking soda

  • 1 teaspoon salt

  • 1/2 teaspoon ground cloves (I used a 1/4 because I know my children shy away from the ground clove taste)

  • Directions

    • In a large bowl, beat the eggs, sugar, oil, orange juice and extract. Combine dry ingredients; gradually add to egg mixture and mix well. Stir in zucchini.
    • Fill paper-lined muffin cups two-thirds full. Bake at 350° for 20-25 minutes or until toothpick inserted near the center comes out clean. Cool for 10 minutes before removing to a wire rack. 
    I intentionally cut back on the sugar because I thought I would add a caramel filling.  (My husband thinks this sounds disgusting, but I thought i was genius.)  The caramel icing filling I planned on using is deliciously sweet.  I would not make this icing everyday, because it takes a bit of tender love and care.  However it does compliment these cupcakes extremely well!  If you make this icing remember you really need to stir stir stir.  It burns very easily.  This recipe is from My Yellow Bluff


    Caramel Icing
    4 ½ c. sugar (save 1/2 c. to brown)
    3 sticks margarine
    1 large can Pet Milk
    1 t. Vanilla
    Mix margarine,milk and 4 cups sugar.  Heat and stir until sugar dissolves.  Melt the ½ c. sugar in a small iron skillet,stirring constantly until brown.  Add to the other mixture,stirring and cooking to soft “ball”stage.  (Soft “ball”stage –Drop a drop of caramel into water to see if it forms a ball).  Let cool.  Add vanilla.  

    This afternoon I had a calm house because all the children were napping at the same time.  I thought, "This is the perfect time to make this time consuming frosting"   As a Mommy, I should have known that the children would instinctively know to wake up just as the sugar was almost but not quite melted. I burnt the sugar when I went to attend to the needs of the kids.  I used it anyways, but the icing had a difficult texture as well as a slightly toasty aftertaste.  I couldn't bare to let the half hour of stirring go to waste, so I put a thin layer of the frosting on top of the cupcakes.  This looked anything but appetizing, so this evening  I added yet another layer of caramel frosting that looks and pipes more like butter cream. The recipe I used was a part of the original Taste of Home recipe.   
     
    CARAMEL FROSTING

  • 1 cup packed brown sugar 

  • 1/2 cup butter, cubed

  • 1/4 cup 2% milk

  • 1 teaspoon vanilla extract

  • 1-1/2 to 2 cups confectioners' sugar


  • Directions:

  •  Combine the brown sugar, butter and milk in a saucepan. Bring to a boil over medium heat; cook and stir for 2 minutes or until thickened. Remove from the heat; stir in vanilla. Cool to lukewarm.

  • Gradually beat in confectioners' sugar until frosting reaches spreading consistency. Frost cupcakes


  • Saturday, August 13, 2011

    Carrot Cake Cupcakes- Week 3

    Is it a cupcake or is it a muffin?  Maybe it is a little of both!  Either way I'm very pleased with how these turned out.  The cupcake and icing recipe is from the cook book The Cleaner Plate Club.  I LOVE LOVE LOVE this cookbook and my family enjoys it as well.  I would highly recommended it to everyone, but especially those who are interested in whole foods.  As a cooking novice, I have found this book extremely informative, and the recipes are tasty.  Now back to the cupcakes....
     
    Ginger-Carrot-Raisin Cupcakes
    Ingredients:
    1 1/2 c plus 1 tablespoon whole wheat flour
    1 1/2 tsp baking powder
    1 tsp cinnamon
    1/2 tsp baking soda
    1/2 tsp salt
    1 c brown sugar
    1/2 c canola oil or applesauce (I used canola oil)
    3 eggs
    1 tsp orange extract
    3 1/2 cup shredded carrots
    1 c raisins
    2 T chopped crystallized ginger
    Directions:
    1. Preheat the oven. 350 degrees
    2. Combine flour, baking powder, cinnamon, baking soda, and salt in a medium bowl, and mix well.
    3. In a seperate large bowl, combine brown sugar, oil, eggs, and orange extract. Cream with an electric mixer.  Slowly add dry ingredients, mixing just until blended.  Fold in carrots, raisins, and ginger.
    4. Spoon batter into 12 muffin cups with liners (When I made this it made almost 20) Bake for about 30 minutes, until a toothpick inserted in the center come out clean. Cool completely.

    Cream Cheese Frosting-
    4 ounces cream cheese, softened
    4 T butter, softened
    1 tsp orange extract
    2 c confectioners sugar

    Directions:
    Combine all ingredients in a medium sized bowl.  Cream with an electric mixer until fluffy. 

      
    Candied Carrot Curls

    I topped the cupcakes with candied carrot curls.  I followed the process I found on The Cup Project Blog. At first look, these seemed a little difficult.  They were much easier than I anticipated, so don't be intimidated by all the step.  With that said, it took me two attempts to successfully make these unique finishing touches.  The first time around I followed the recipe exactly, or at least I think I did.  The bake times were much too long.  I don't know if this is because my oven is extremely off or if my carrot curls were too thin.  When I took them out of the oven they crumbled before I could curl them.  So...my boys had a tasty carrot candy snack while I started Candied Carrot Curls round 2.  This time I changed the water sugar ratio and monitored the cook time more closely. I have noted the changes I made in the recipe. 

    Ingredients

    1 large carrot or 2 medium carrots
    1 cup water (I used 1 1/4c)
    1 cup sugar


    Directions
    1. Peel layers from carrot lengthwise on one side with peeler until you begin to get wide slices. Peel wide strips, reserving them, until you get about 15 ( I used the entire carrot)
    2. Bring water and sugar to a boil in a small heavy saucepan, stirring until sugar has dissolved.
    3. Add carrot strips and simmer, uncovered, 15 minutes. 
    4. Strain through a sieve into a bowl, discarding syrup.
    5. Let stand 15 minutes.
    6. Preheat oven to 225 F with rack in middle.
    7. Line a large baking sheet with nonstick liner, then arrange candied carrot slices flat in 1 layer on sheet

    1. Bake until dry but still flexible, about 30 minutes. (I baked mine for about 13 minutes)
    2. Wind carrot strips, 1 at a time, around end of handle of a wooden spoon in a loose spiral, then slip off each curl and return, seam sides down, to lined baking sheet
    1. Return curls to oven to dry until crisp, 30 to 45 minutes more. ( I baked mine for about 15 minutes)
    2. Cool completely on baking sheet.  Carrot curls can be made 5 days ahead and cooled completely, then kept in an airtight container at room temperature. Recrisp in a 250 F oven 10 minutes. Don't put them on your cake until just before serving or they will get